Prerequisites
To get the most out of this guide, you’ll need to:- Create an Access and Secret Key
- Have a WooCommerce store
1. Install the OrcusPay Plugin
- From your WordPress dashboard, navigate to Plugins > Add Plugin.
- In the search bar, type OrcusPay for WooCommerce and hit enter.
- Locate the official OrcusPay for WooCommerce plugin and click Install Now.
- If you prefer, you can open the plugin page directly from WordPress.org: https://wordpress.org/plugins/orcuspay-for-woocommerce/.
2. Activate the Plugin
- After the installation is complete, click Activate. This will make OrcusPay available for use in your WooCommerce setup.
3. Configure the OrcusPay Plugin
- Once activated, navigate to WooCommerce > Settings from your WordPress dashboard.
- Click on the Payments tab.
- You will see OrcusPay listed as one of the payment methods. Click on it.
- Now, enter your OrcusPay API key and API secret in the appropriate fields.
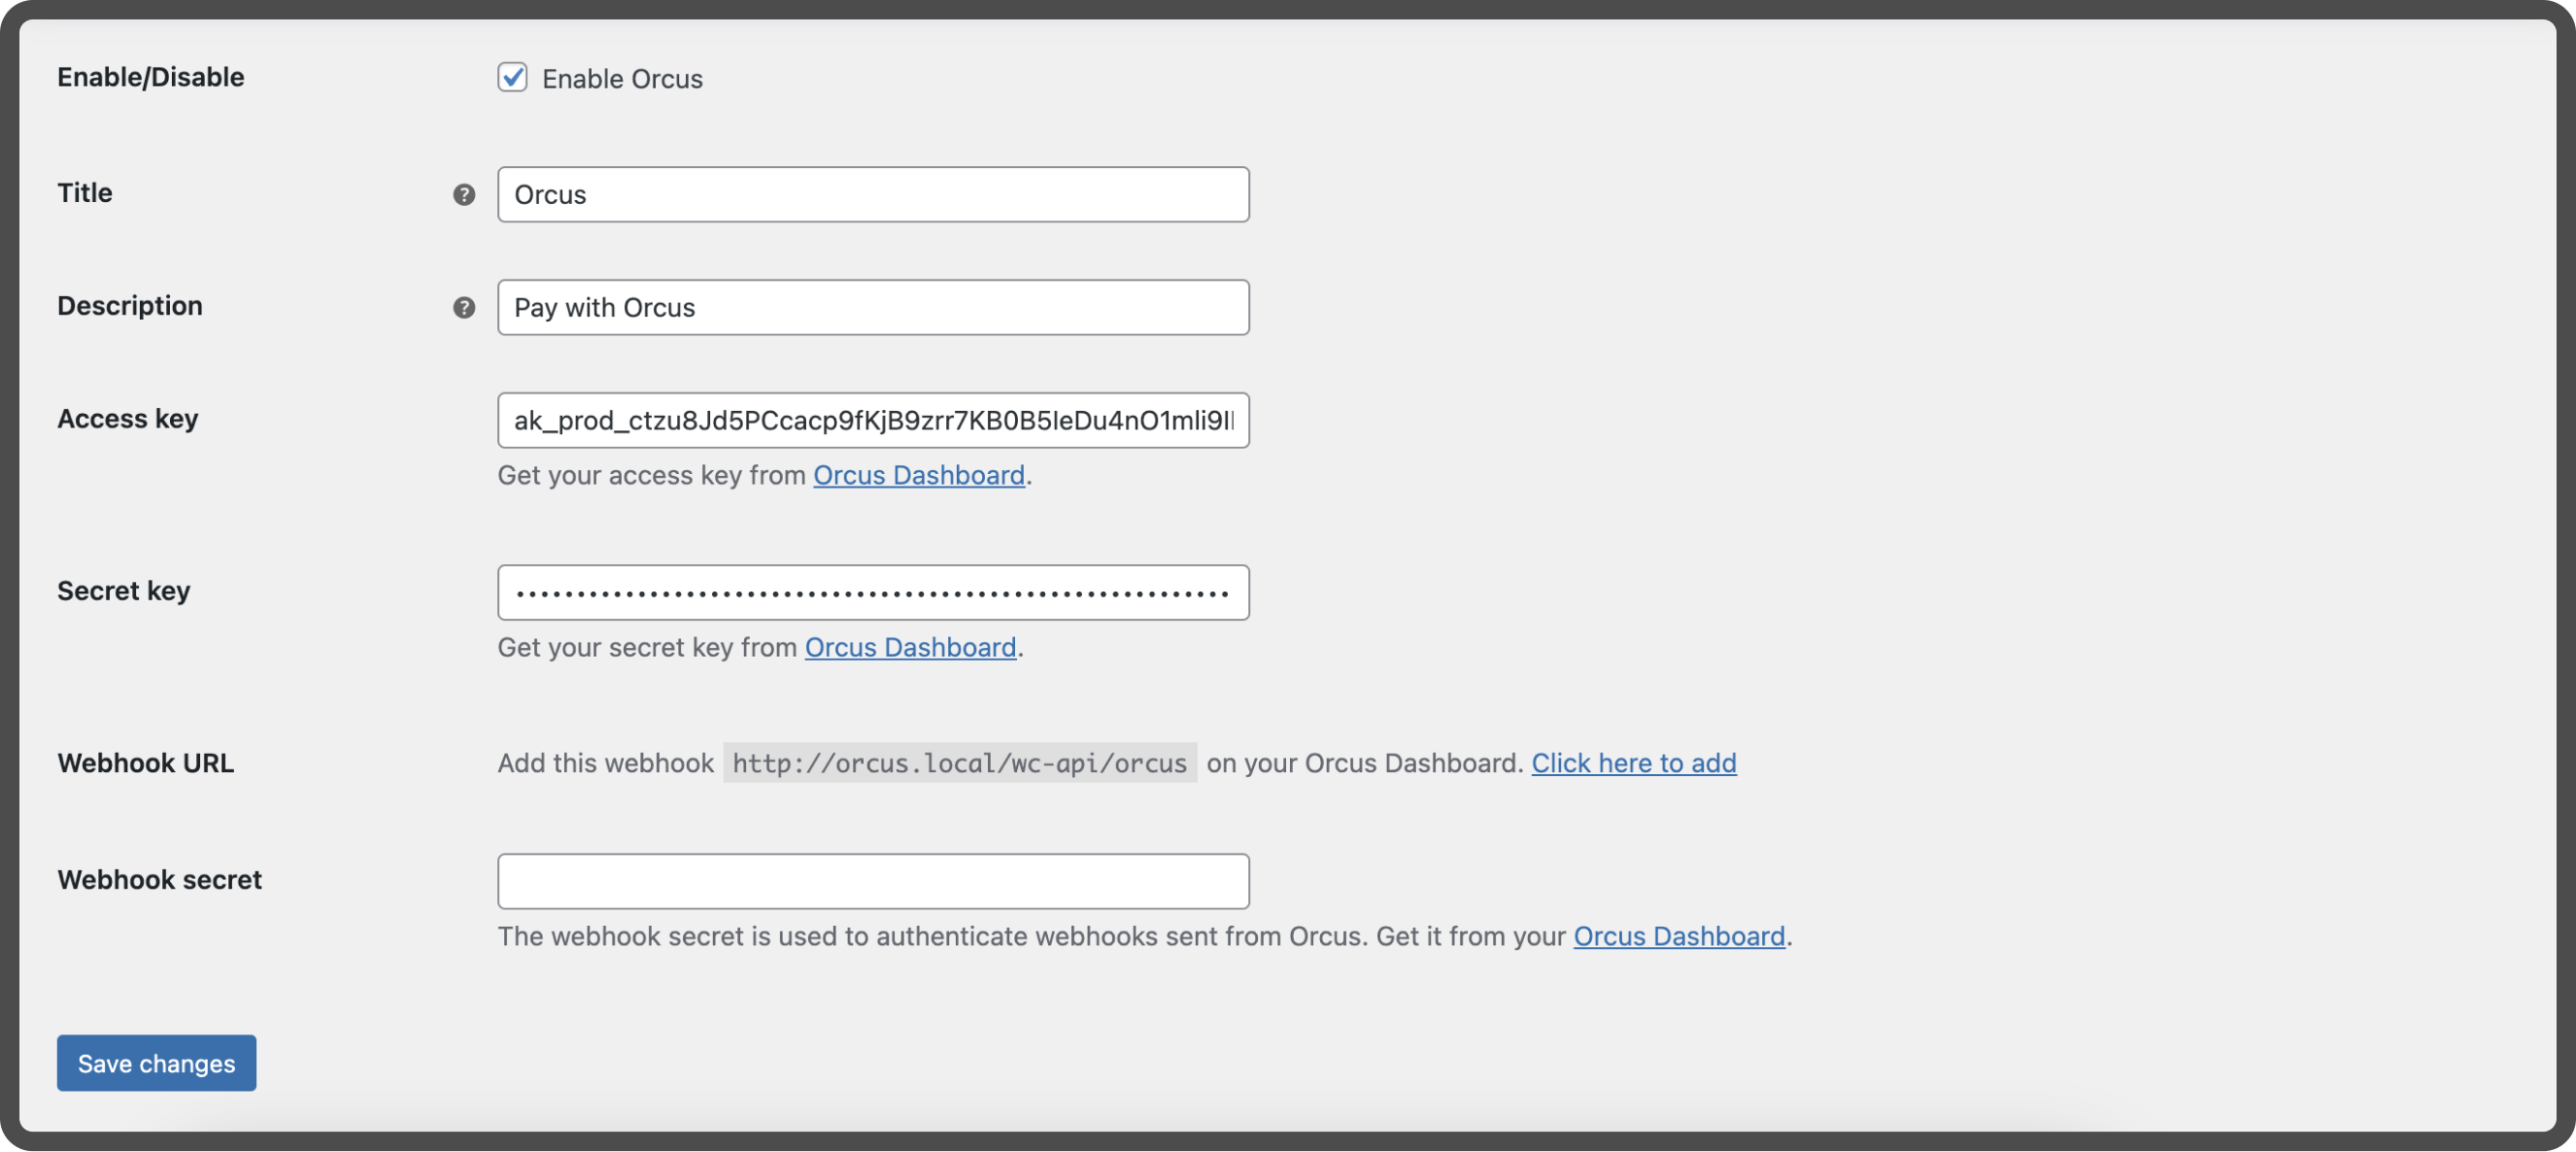
- Copy the Webhook URL shown on the page.
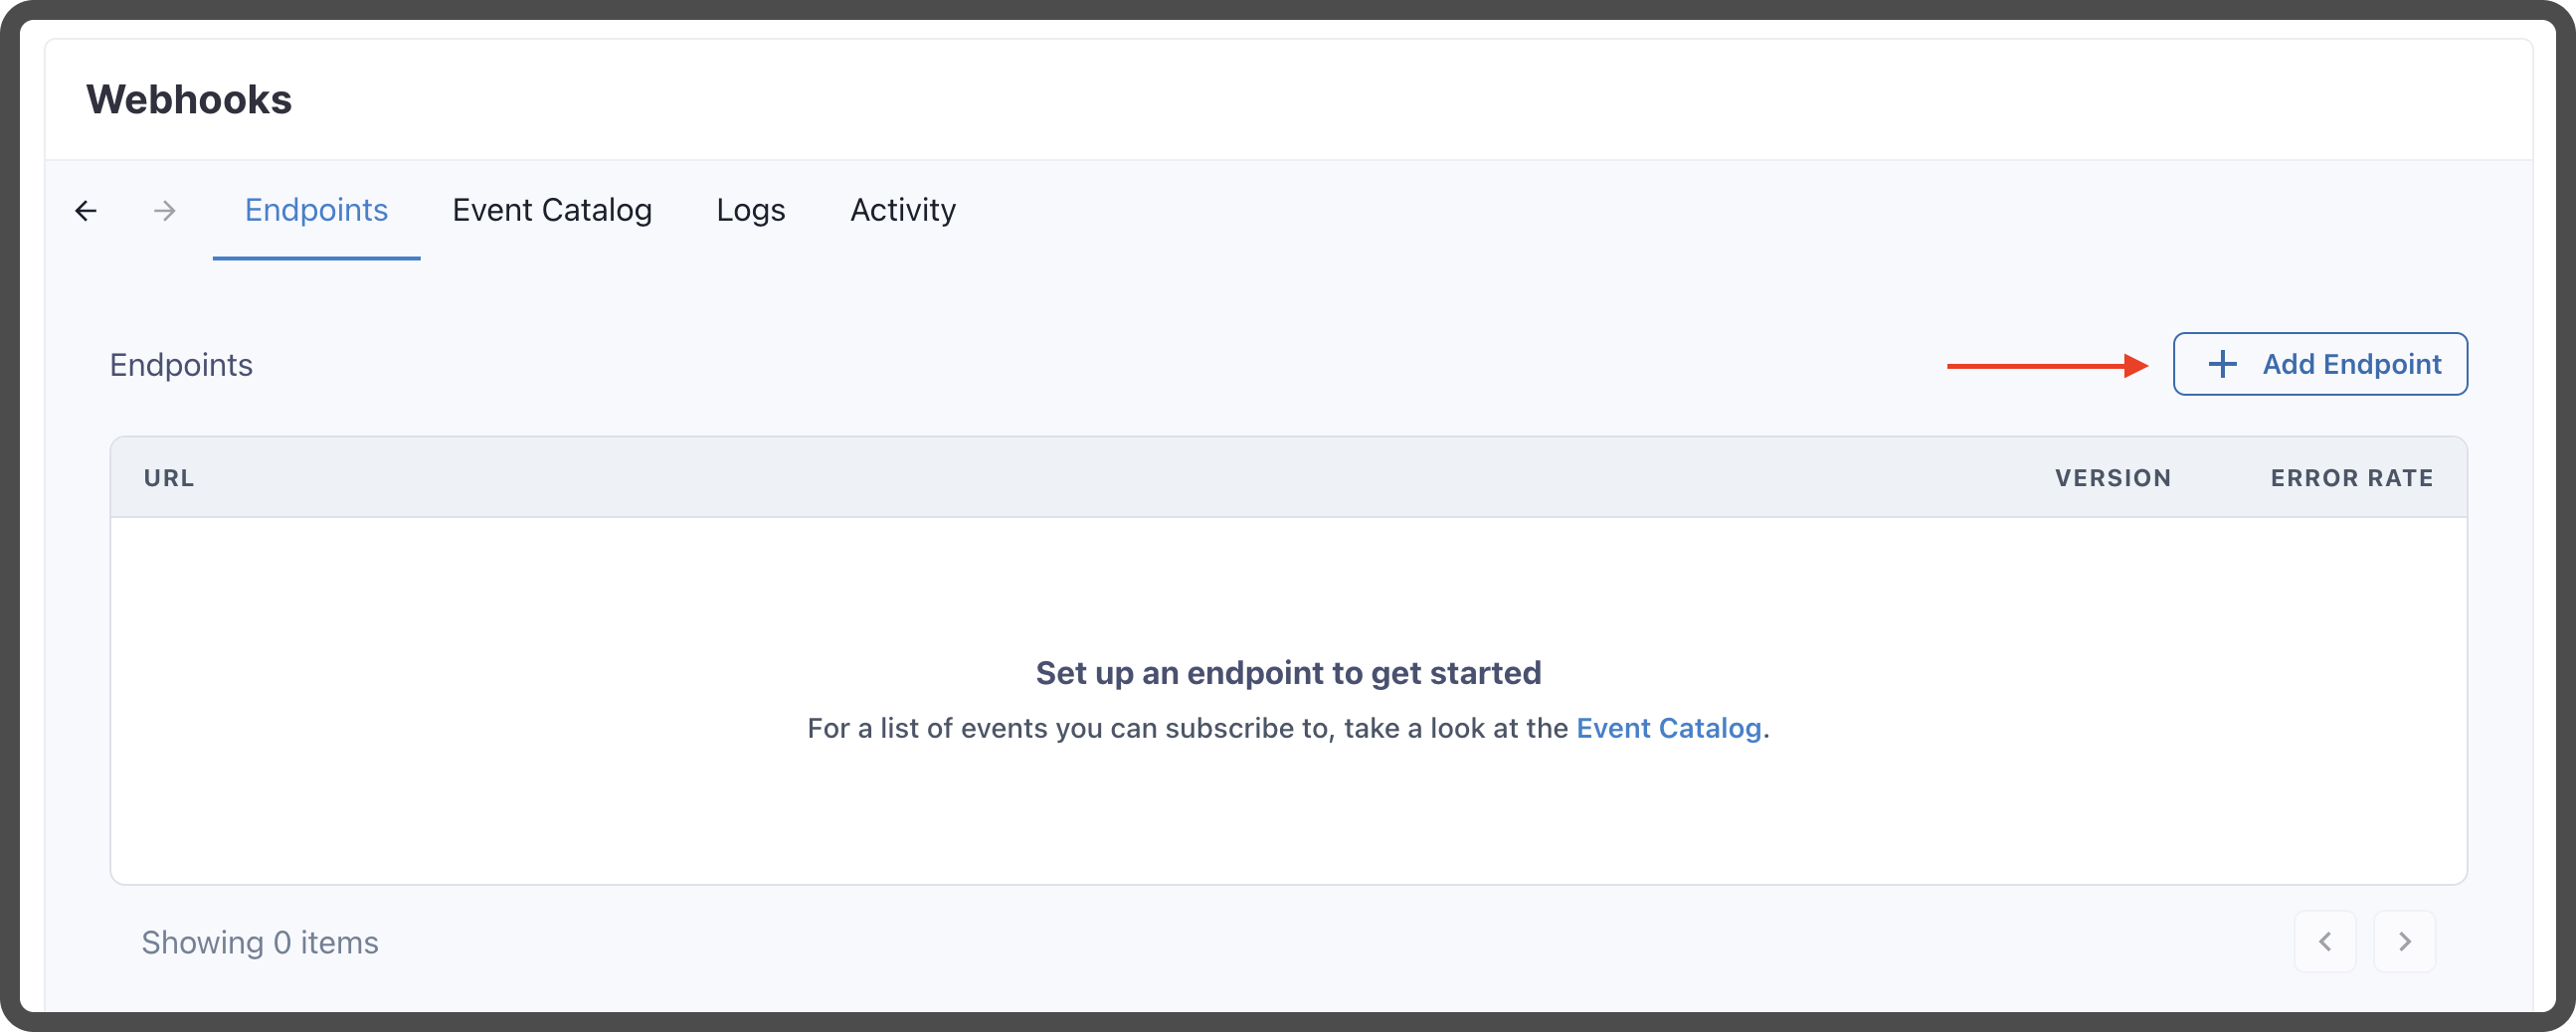
- Go to OrcusPay webhooks and click Add Endpoint.
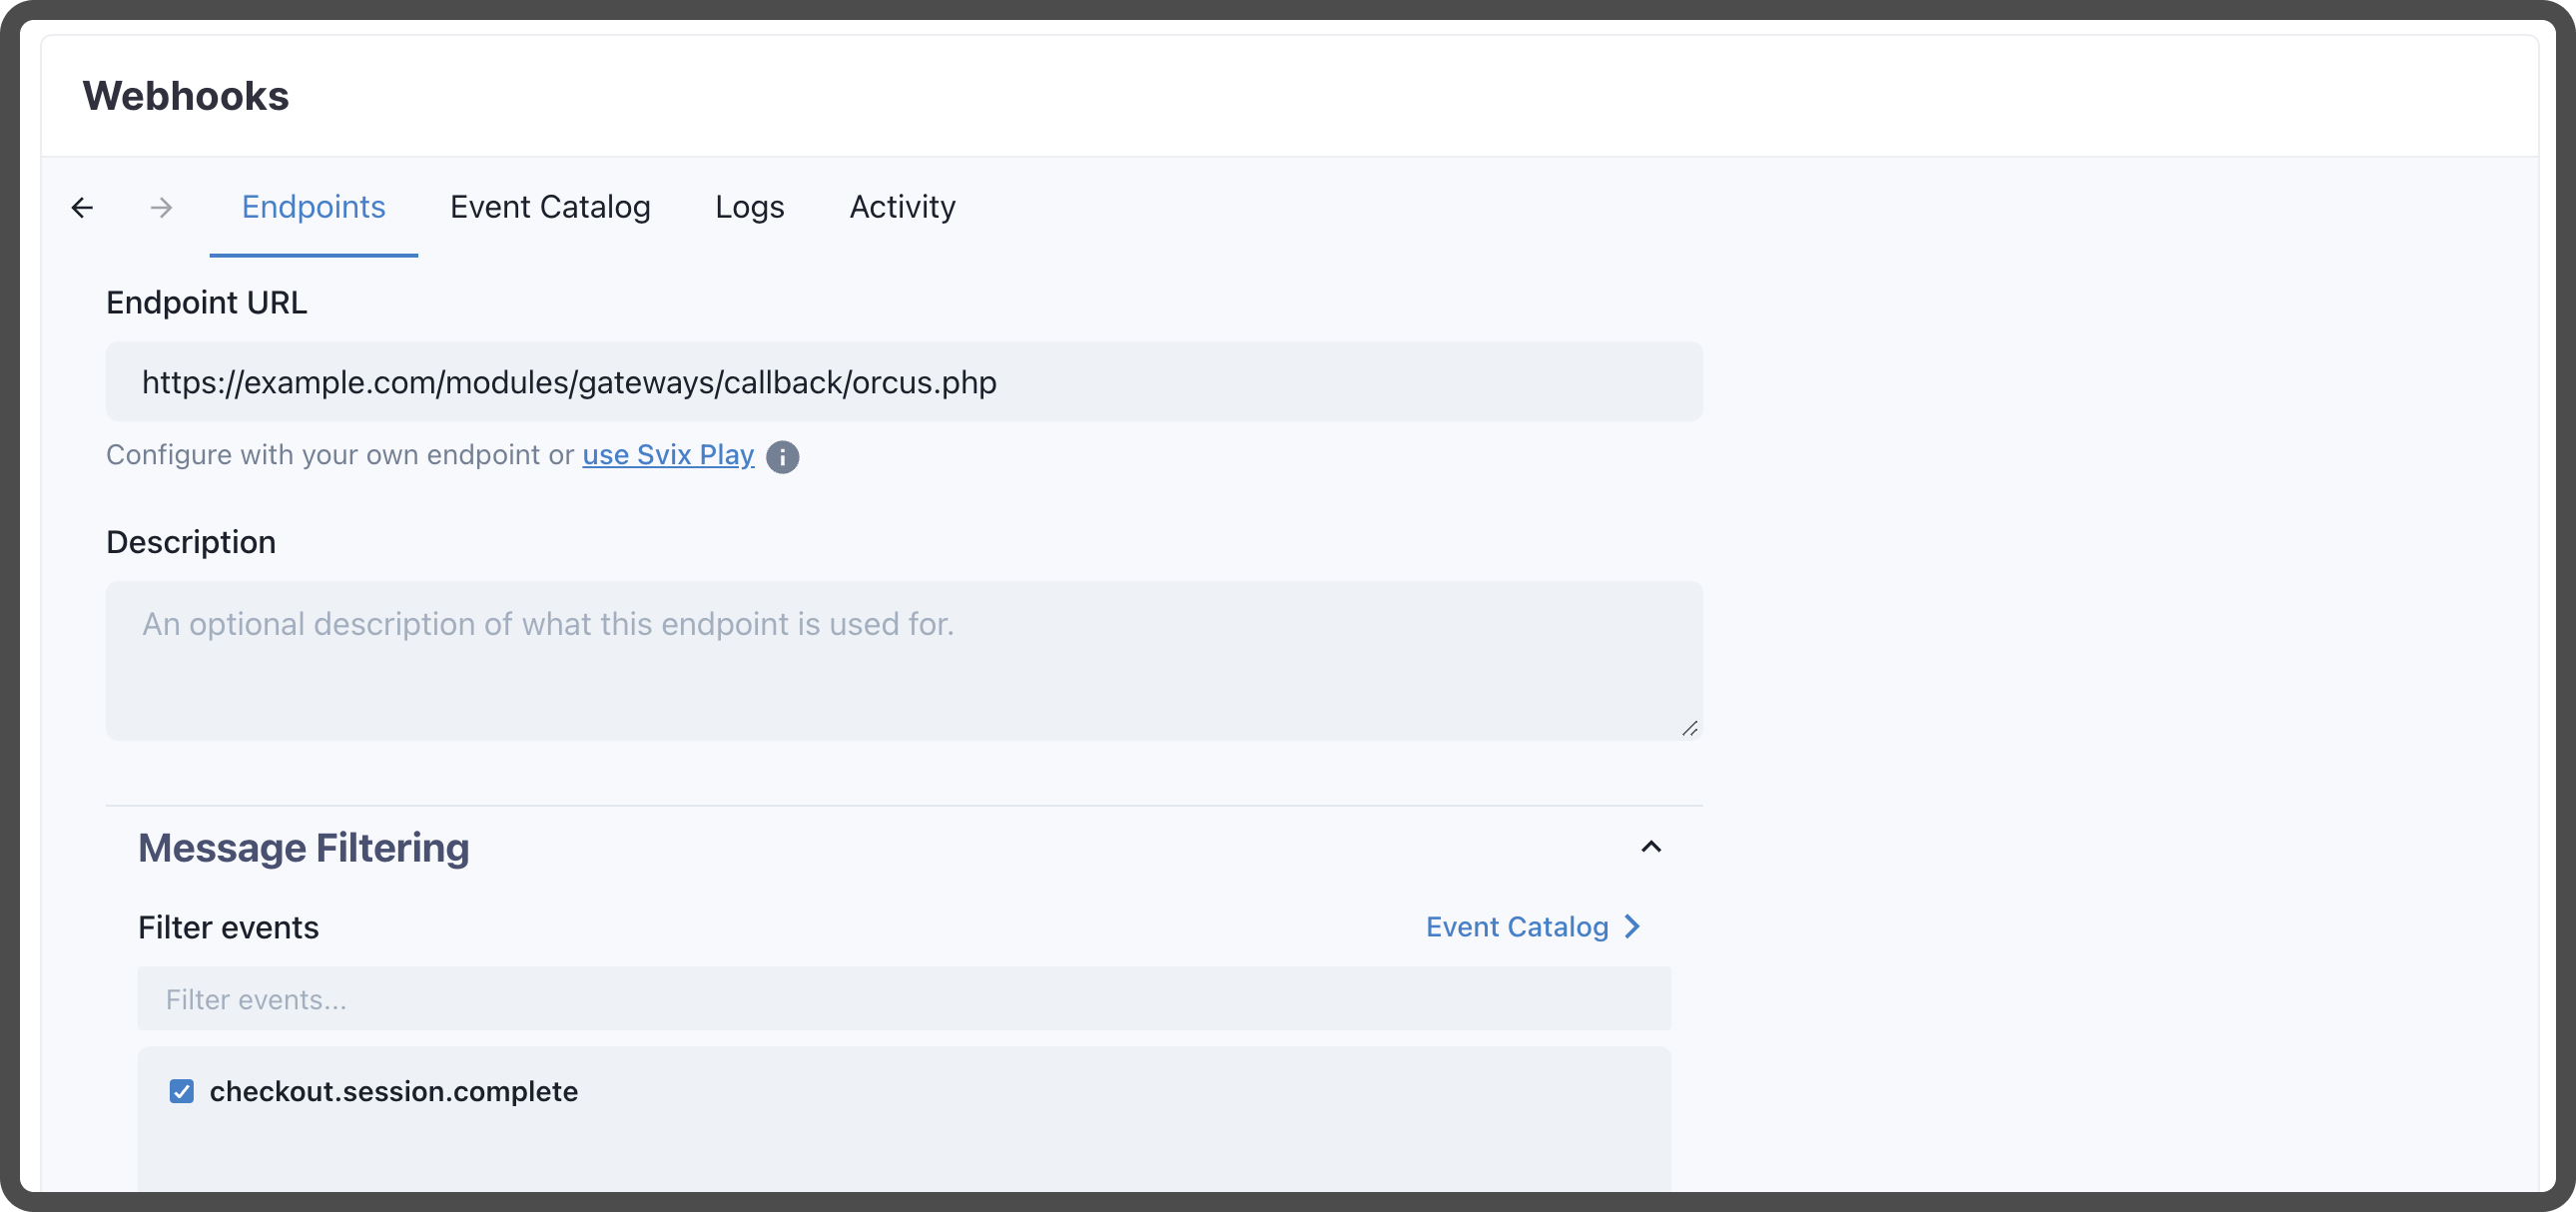
- Paste the Webhook URL you copied earlier, select
checkout.session.completefrom the Event, and click Create.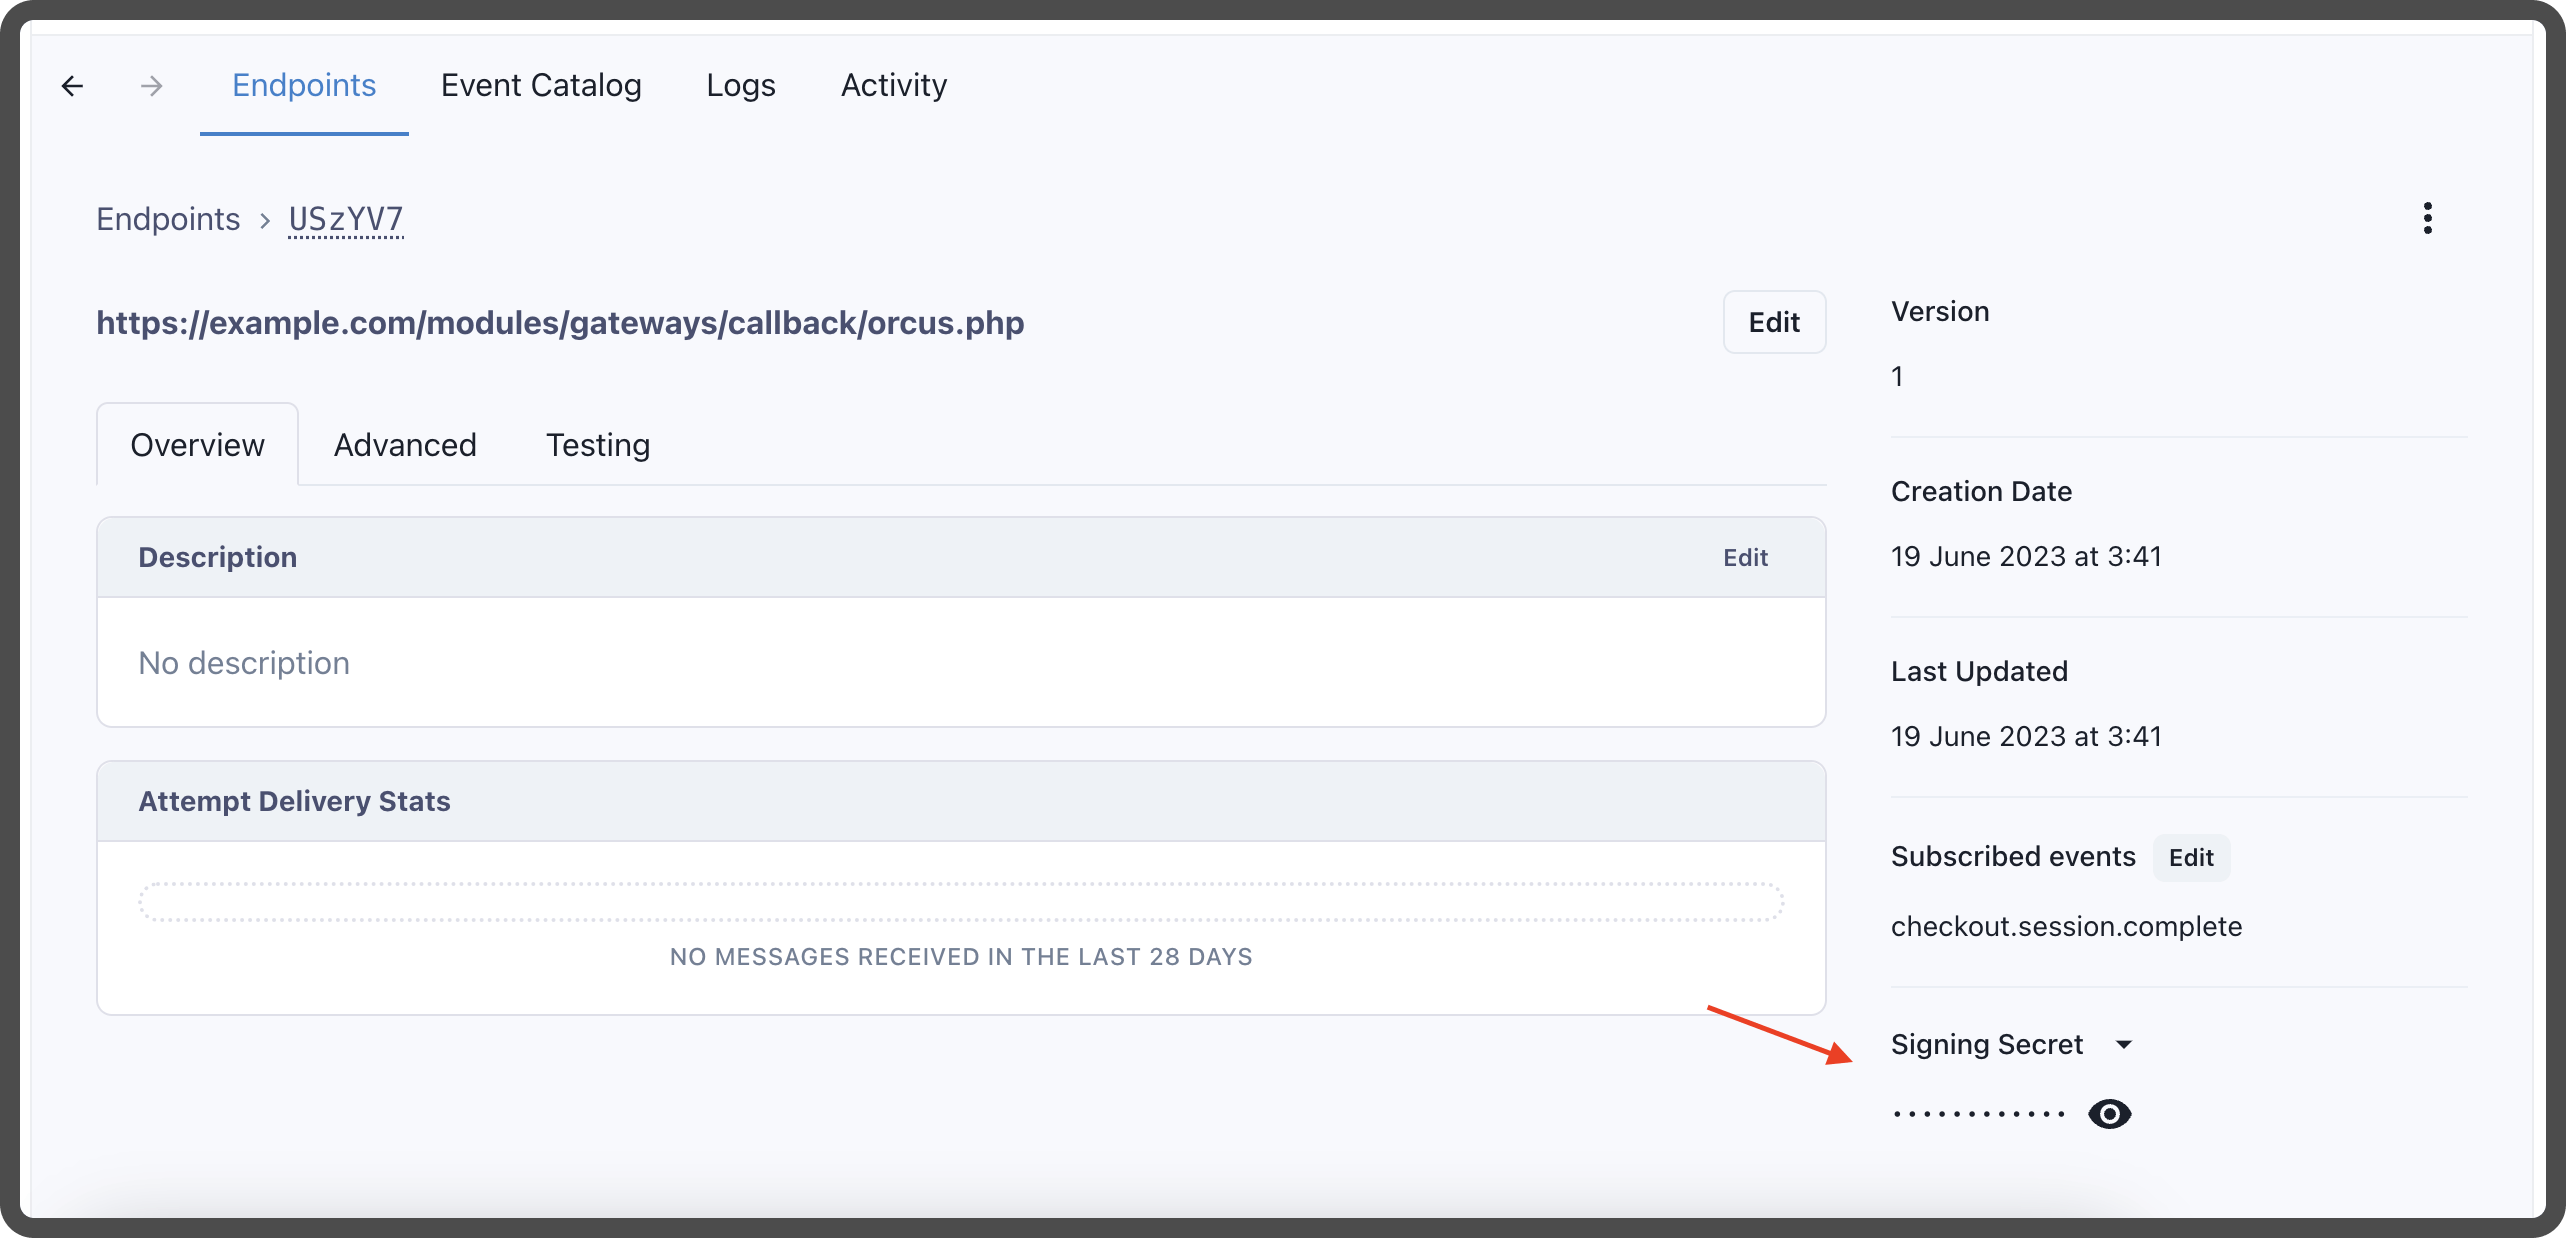
- After creating the webhook, you will get a Signing Secret. Copy the Signing Secret and paste it in the Webhook secret field in the Orcus plugin configuration page.
- Click Save Changes.
4. Testing the OrcusPay Plugin
- Visit your WooCommerce store front-end and try to purchase a product.
- At the checkout page, choose OrcusPay as the payment method and proceed.
- Ensure the transaction goes smoothly and the payment reflects in your OrcusPay dashboard.